Configuring Notification Channels
In some cases, users may want different models to deliver notifications to different email addresses, Slack channels, or PagerDuty instances. This level of customization is possible via the WhyLabs API. The process involves just two steps:
- Creating the desired action (delivery method)
- Updating the configuration of the monitor
An action represents any action which can be taken in the event that an anomaly is detected. Currently, actions include notifications via email, Slack, or PagerDuty. Once created, actions can be linked to specific monitors applied to your projects.
To create actions, the users will need an API key and the relevant organization ID which can be obtained from the “Access Tokens” subsection within the Settings section.
Creating a new action
In order to create a new notification action, the PutNotificationAction API needs to be called. The user can submit the required request via the UI or programmatically via the command prompt, following the instructions below.
This example will walk you through the process for email actions. See below for how this process should be modified for Slack or PagerDuty.
First, a PUT request has to be made to the following endpoint, providing the email in the payload:
https://api.whylabsapp.com/v0/notification-settings/{org_id}/actions/EMAIL/{action_id}
The action_id is what you will need to reference in your monitor configuration. It is defined by the user and has to be unique across the organization.
import requests

# replace org-id and action-id
url = 'https://api.whylabsapp.com/v0/notification-settings/org-xxxx/actions/EMAIL/test-email1'

headers = {
    'accept': 'application/json',
    'X-API-Key': 'xxxxxxxxxxxxxxxxxxx'
    }

payload = {
    'email': '[email protected]'
}

response = requests.put(url, headers=headers, json=payload)
In order to view all of the actions available to an org, use the following:
# replace org-id
url = 'https://api.whylabsapp.com/v0/notification-settings/org-xxxx/actions'

headers = {
    'accept': 'application/json',
    'X-API-Key': 'xxxxxxxxxxxxxxxxxxx'
    }

response = requests.get(url, headers=headers)
Response:
[
  {
    "id": "test-email",
    "type": "EMAIL",
    "payload": {
      "email": "[email protected]"
    }
  },
  {
    "id": "test-email2",
    "type": "EMAIL",
    "payload": {
      "email": "[email protected]"
    }
  }
]
Note that the results here only include custom global actions created by users via API. If an email has been configured in this organization's notification settings, it will not show up in this list, but will still be available for use.
Adding Actions to Monitors
Once actions have been created, they are available for use in monitors. Monitor JSON can be updated directly in the UI or programmatically.
Adding Actions to Monitor JSON Via UI
To add an action to a monitor via the UI, navigate to the desired monitor and click the “view JSON” button:

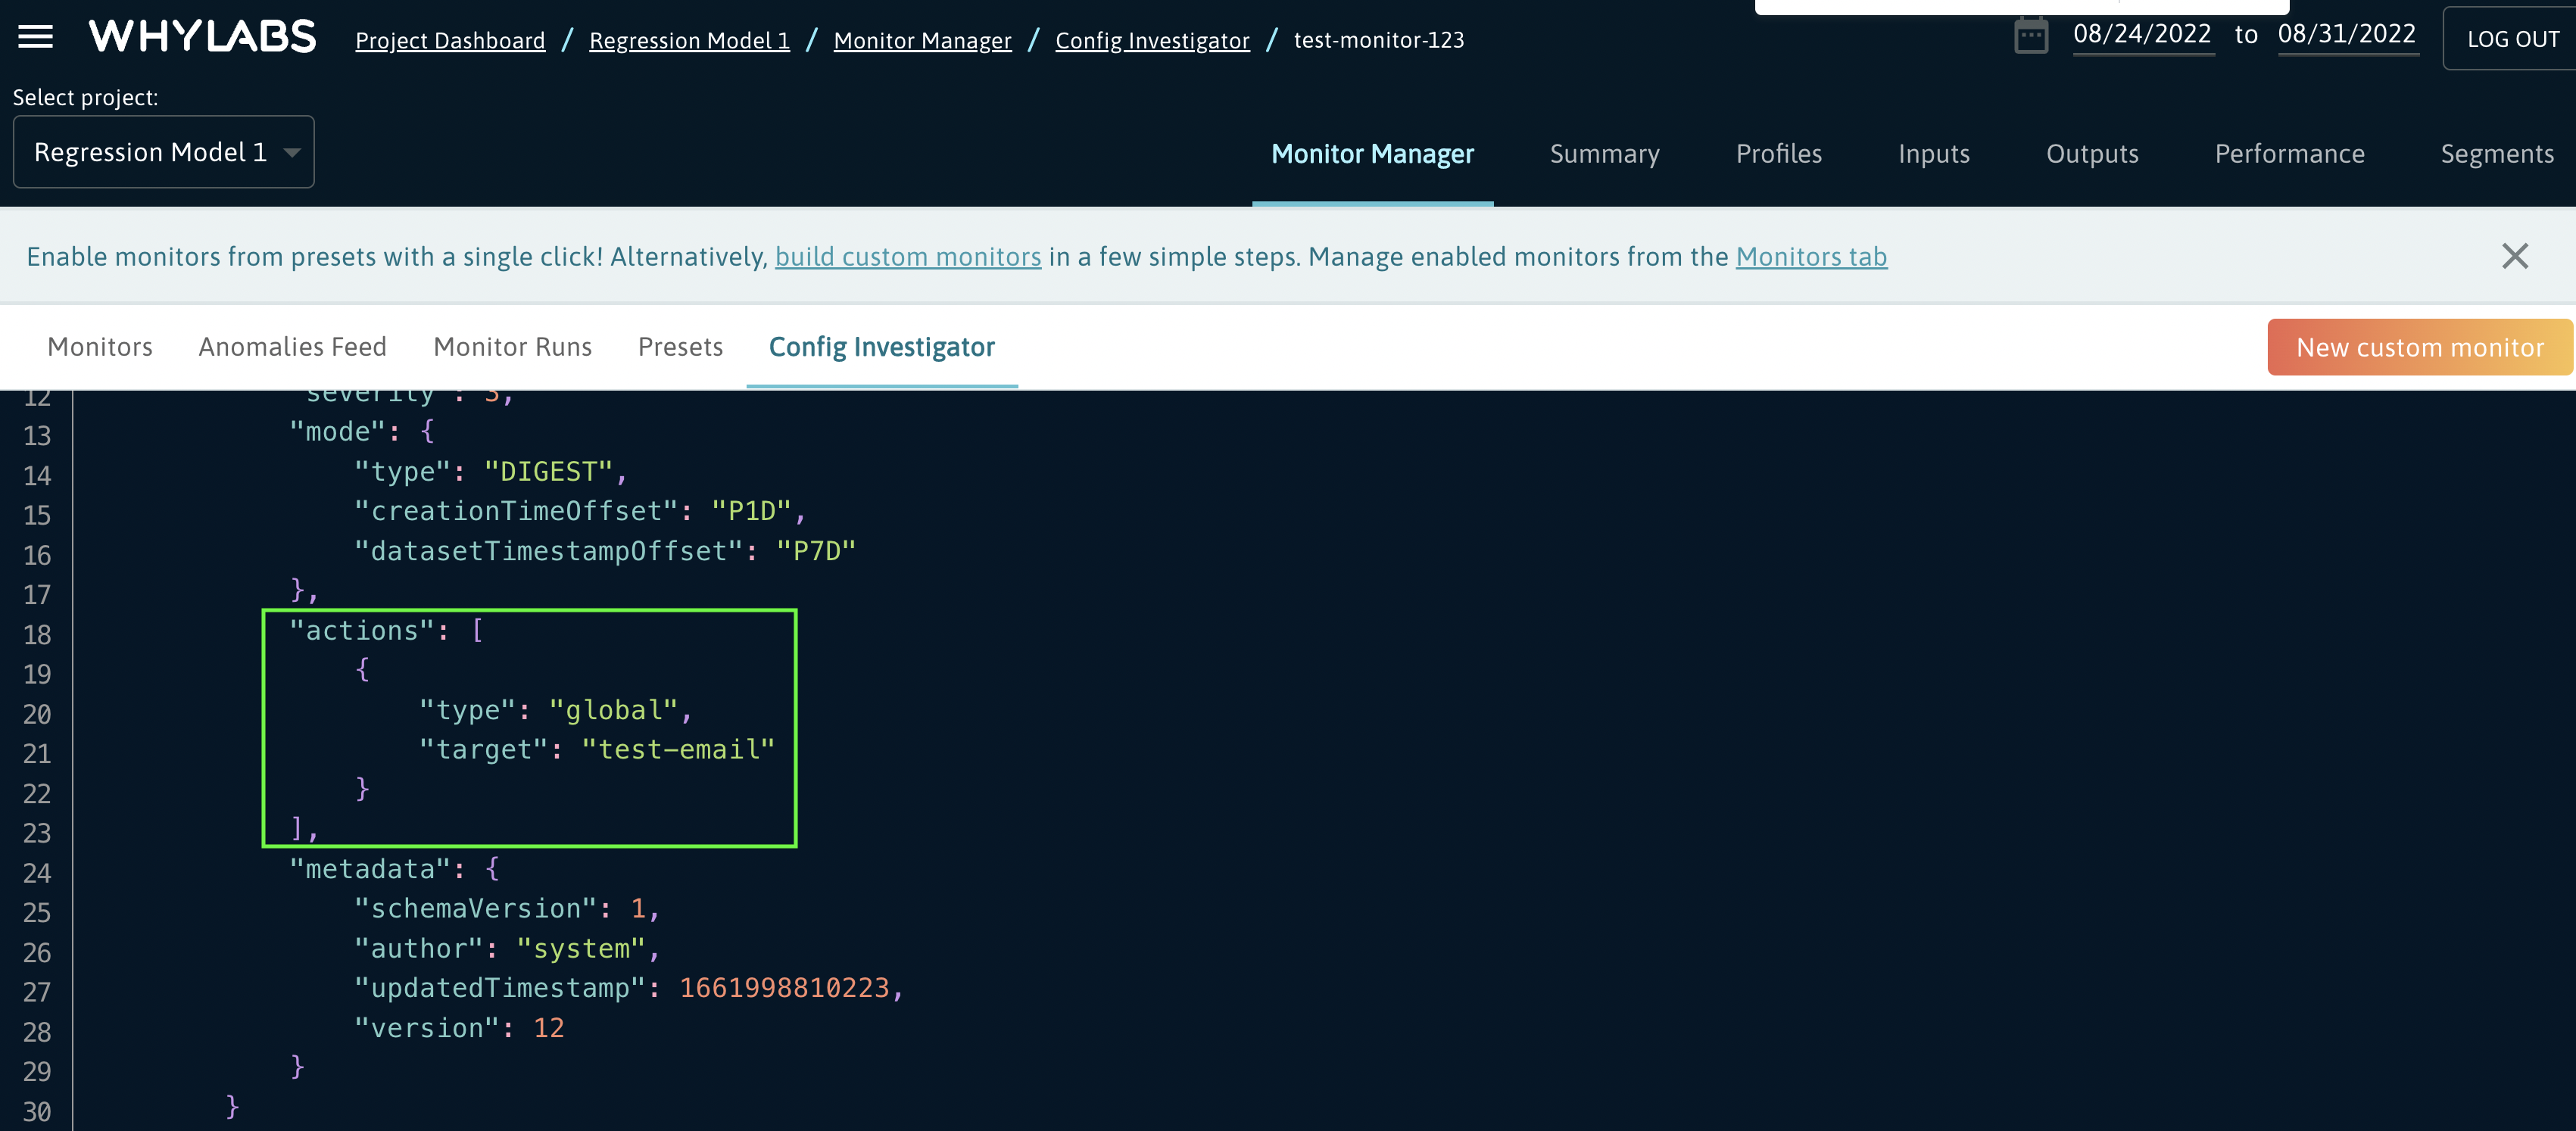
From here, click the “Edit” button in the upper right corner of the JSON viewer. If an edit button is not available, reach out to us to have this enabled. Within the monitor config, you’ll find an “actions” list. To add a newly created action to a monitor, add an element to this list in the following format:
{
    "type": "global",
    "target": "ACTION_ID"
}
The type will always be global, and the target should be set to the ID of the desired action.

Users may see that an email action like the following already exists:
{
    "type": "global",
    "target": "email"
}
This is the default email action which uses the email address configured in the org settings. This can be removed if desired. After making updates, save the config and you’re good to go! Note that this must be done for each of the monitors tied to a model in order for each of the model’s notifications to be delivered to the new custom global action.
Adding Actions to Monitor JSON Programmatically
In order to add an action to a monitor, users will need the desired
- API Key
- Org ID
- action_id
- dataset_id (model_id)
- Monitor name or id (only if specific monitors should be updated)
In this example, we will add a custom global action to each of the monitors belonging to a model. First, we pull all of the monitor config for a particular model:
# replace org-id and model-id
url = 'https://api.whylabsapp.com/v0/organizations/org-xxxx/models/model-xxxx/monitor-config/v3'

headers = {
    'accept': 'application/json',
    'X-API-Key': 'xxxxxxxxxxxxxxxxxxx'
    }

response = requests.get(url, headers=headers)
Now, we loop over each monitor associated with this model and add the new custom global action to the list of actions for each monitor. Once we’re done updating, we make a PUT request to update the monitor.
import json

new_action = {"type": "global", "target": "test-email"}

monitor_config = response.json()

for i in range(len(monitor_config['monitors'])):
        monitor_config['monitors'][i]['actions'].append(new_action)

# replace org-id and model-id
url = 'https://api.whylabsapp.com/v0/organizations/org-xxxx/models/model-xxxx/monitor-config/v3'

response = requests.put(url, headers=headers, json=monitor_config)
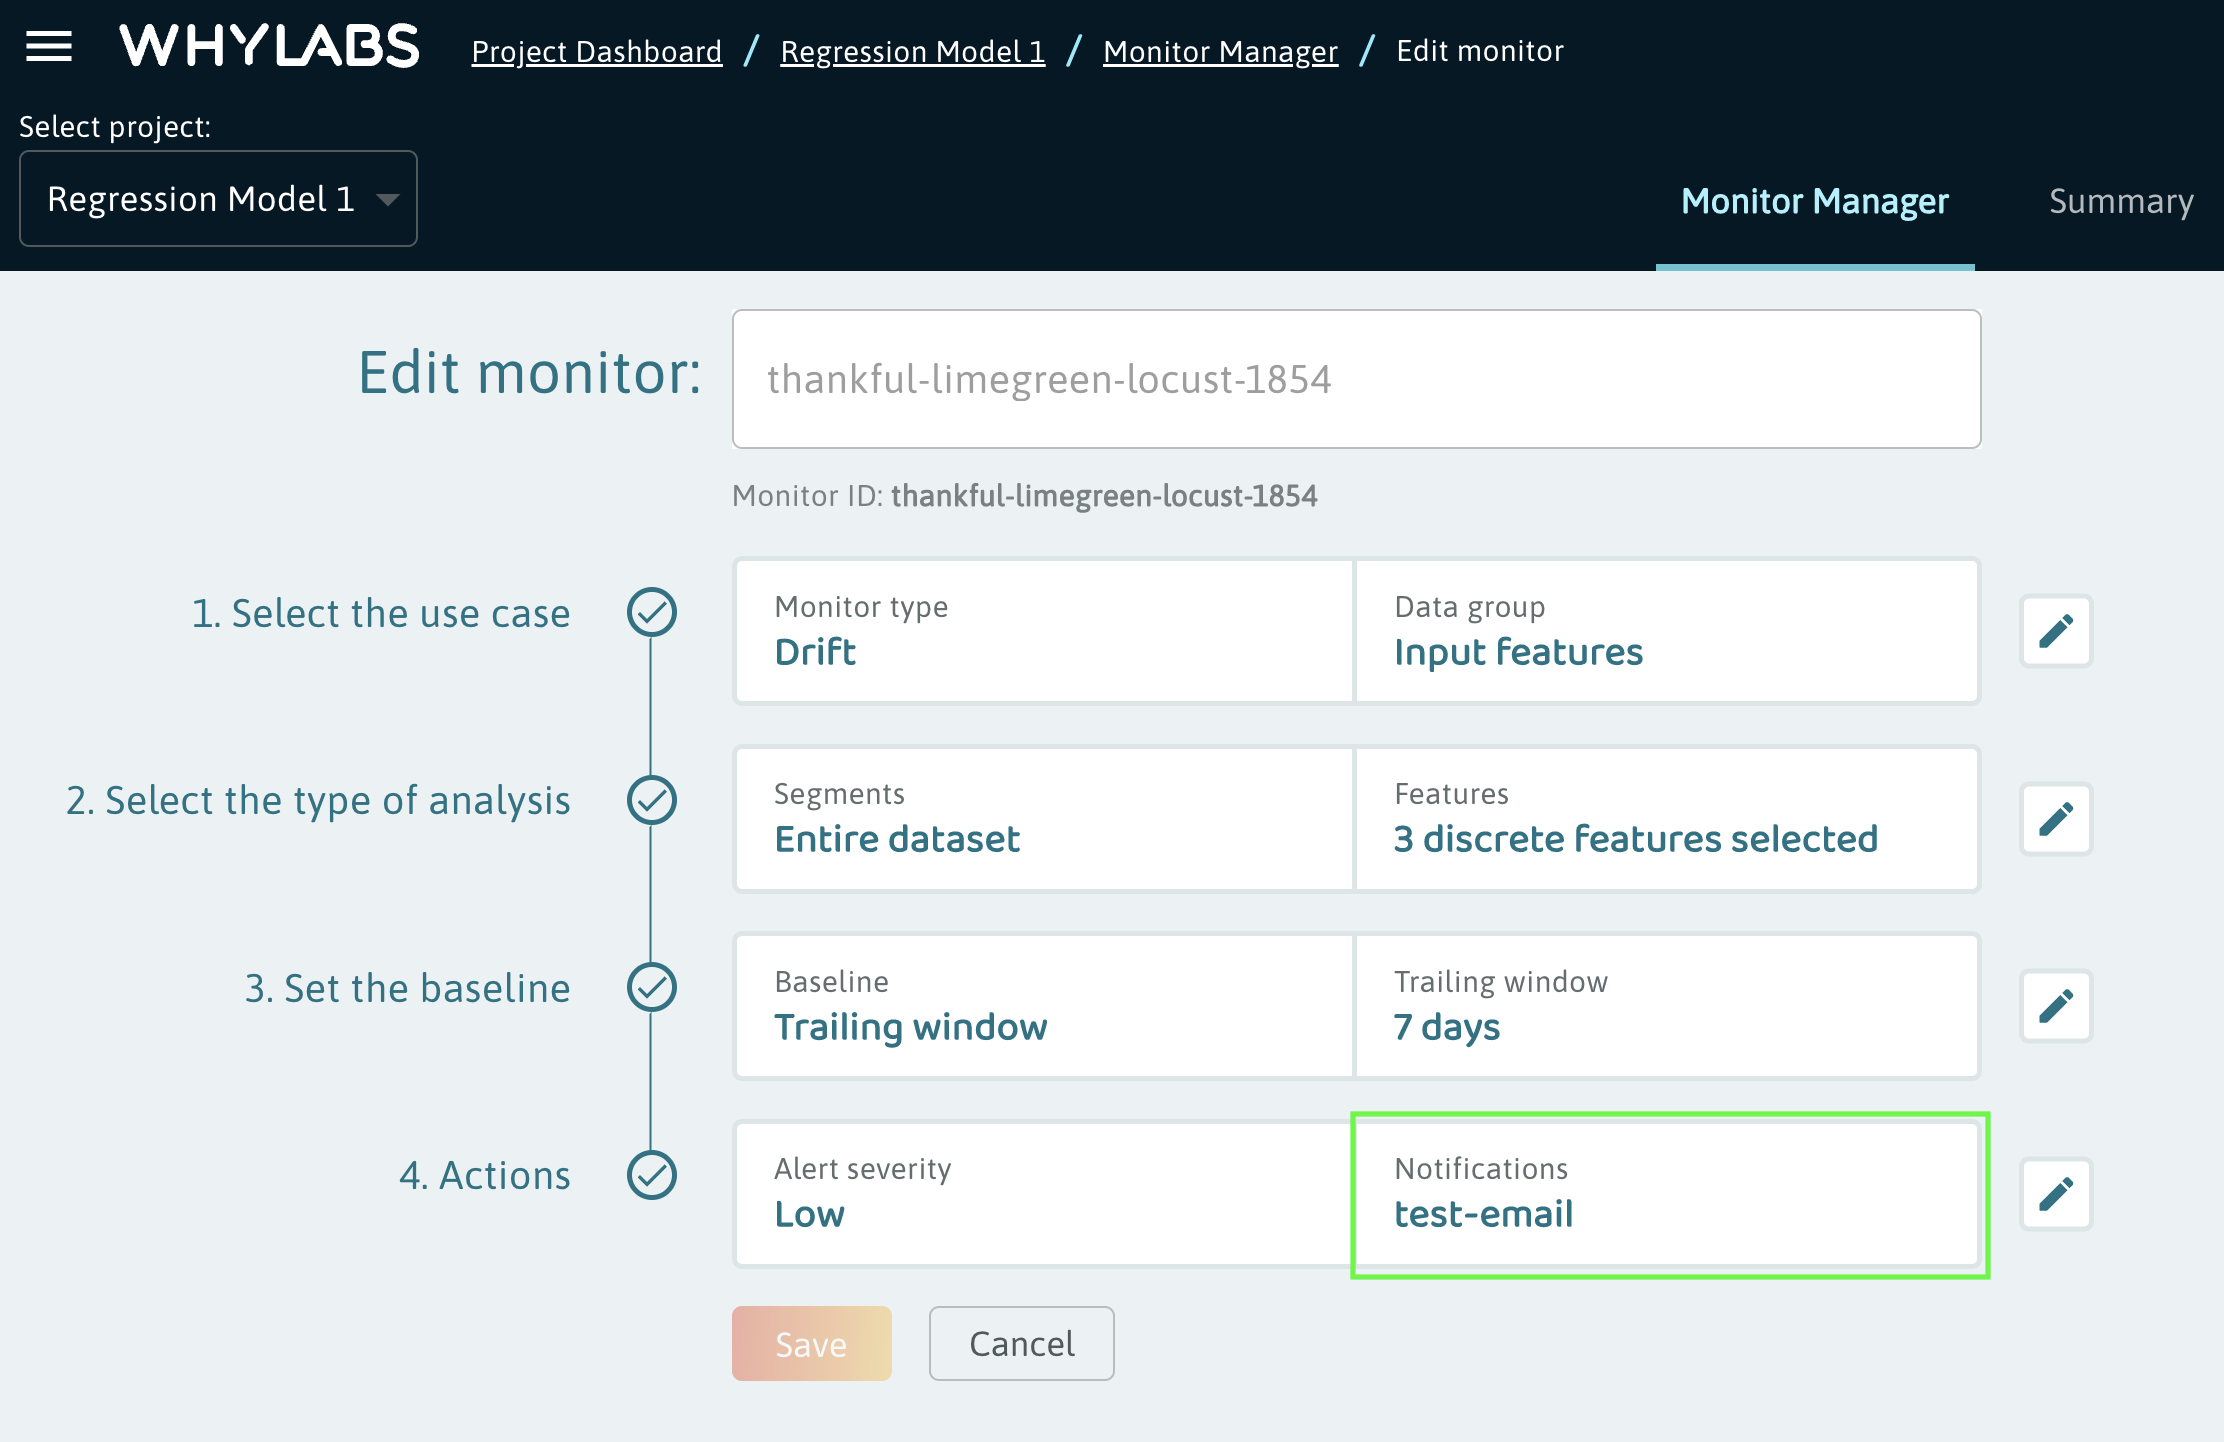
Upon completion, users can validate the update by re-pulling the monitor config or inspecting the JSON in the UI. Users should see the new custom global action ID listed when editing a monitor in the UI:

Slack and PagerDuty
Custom global actions can be created for Slack and PagerDuty as well. For these cases, urls and payloads for creating the actions must be updated as shown below:
Slack
Endpoint:
PUT
https://api.whylabsapp.com/v0/notification-settings/{ORG-ID}/actions/SLACK/{ACTION-ID}
Payload:
{
  "slackWebhook": "https://hooks.slack.com/services/xxxx/xxxx/xxxx"
}
PagerDuty
Endpoint:
PUT
https://api.whylabsapp.com/v0/notification-settings/{ORG-ID}/actions/PAGER_DUTY/{ACTION-ID}
Payload:
{
  "pagerDutyKey": "xxxxxxxxxxxxxxx"
}
Further Notes
Updates to monitors via the UI will not remove any custom global actions added to your monitors. These must be removed via API or by editing the monitor JSON directly in the UI. For more on the capabilities of the WhyLabs API, check out our Swagger.

